Lentil & Mushroom Casserole

Lentil & Mushroom Casserole


Finally… Can you smell it? Spring! I am so excited for warmer weather and brighter days. The fact the days are longer now, after the clock’s recent change has helped my mood a lot. The other weekend I got inspired and cleared out a space for some vegetable growing, and then the following day (in the pouring rain) I drove to town to buy some timber to make a raised bed.

This will be my fourth year of growing vegetables. I decided to build a simple 2 x 1 m frame, which should be easy to dismantle the day I leave here, yet should give me ample space to grow some root vegetables for this coming season. The property also has an old disused green house so I’m hoping I will be able to have some tomatoes and a few herbs like coriander and basil in there. Next up, getting some manure + ordering some seeds. All the exciting stuff. It truly is such a rewarding thing to grow your own veggies. It is definitely an adventure which has helped me fostering some patience as well as trust.

You can’t will the seeds out of the ground. It takes nurturing, patience and a tad skill. Such a good metaphor for life in general I think…


On a totally different note though, the recipe I am sharing this week is one of those comforting, budget friendly and very versatile ones. And it is one I’ve eaten on repeat over the past few months. These long cold AND wet months had me craving foods that were more stodgy, warm and nourishing. As well as that I have also had a desire to eat other high energy foods like oats (especially in combination with sugar and butter…). I am beginning to feel ready to have some lighter meals soon, with more greens and raw foods. Maybe you are too?

However I thought now would still be a good time to share this recipe, whilst we are still note truly there yet, and if you are like me, feeling the pinch of heating bills… then something that is budget friendly and that can be made any day of the week from mostly store cupboard ingredients is hopefully welcomed!

I’m not sure “casserole” is actually a good name for this dish as it is more like a vegetarian bolognese and even a little meaty in texture. It could even be a good one to try out for Meat Free Monday or to serve those avid meat eaters, whom you’d like to introduce to some more plant based dishes.

Then on the other hand, how and with what you serve it is, entirely up to you. I have so far had it with rice, pasta, a fried egg (like in the picture) and with roasted sweet potatoes. I would imagine it can pair with “normal” roasted potatoes, even mash, or as a side dish to baked fish. One basic dish. Many options!

straightforward nutrition


Lentil & Mushroom Casserole

Serves 4

1 tin chopped tomatoes

250g fresh mushrooms (I like chestnut mushrooms)

1 large yellow onion, peeled & chopped finely

5 cloves of garlic, peeled & chopped finely 

1 red or yellow pepper, washed & chopped finely

1 tbsp dried oregano

2 bay leaves (fresh or dried)

1 tsp dried thyme

2 tsp smoked paprika

Sea salt & Black pepper to season

Approx. 1 cup cooked lentils such as beluga or puy lentils


Start with cooking the lentils. Exact measurements aren’t really important here, so measure out 3/4 cup. Then rinse well before placing in a saucepan and adding enough water to cover the lentils by 1 inch. I usually add a bay leaf or two to this also. 

Bring the lentils to the boil and then reduce to a simmer. If you let them boil to hard they will just cook apart. Simmer for about 35-40 min until they squeeze soft between your fingers. Drain, rinse and set aside.

Heat a little olive oil in a saucepan. Add chopped onion and sauté until soft and translucent. Add the chopped pepper  and mushrooms and saute for another few minute or two until soft-ish. Add the chopped garlic and sauté for another minute.

Add the tin of chopped tomatoes, the cooked lentils and the spices. Give it all a really good stir and then bring to a lively simmer for 20 min until the sauce has thickened. Season to taste.

Let cool slightly and then serve with your choice of side (as suggested above) + some greens. Oh and some grated Parmesan is totally yum to add grated on top. If that’s your thing.


straightforward nutrition

Apple & Pumpkin Soup

Apple & Pumpkin Soup


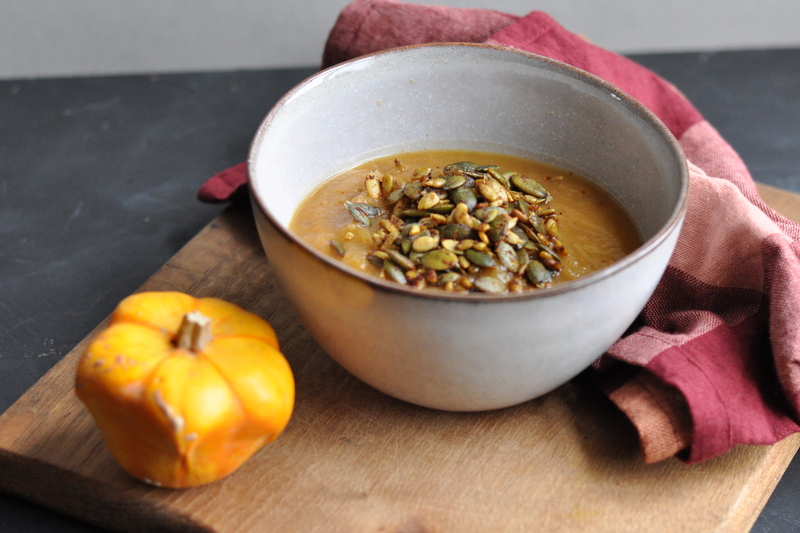
Halloween has just been (and the Christmas decorations are already appearing around the place!) but for all my U.S friends Thanksgiving is just around the corner. So I suppose it is still pumpkin season.

I was contemplating the other day how nature seem to have provided us with a natural harmony of flavour pairings. It seems like many foods that are in season at the same time, go well together.

Like apple and blackberries, or apples and pumpkins. Or hazelnuts and mushrooms. Each season has its own charm, yet there’s something so comforting about the foods that comes with this time of the year. I don’t know about you but I naturally yearn for more stodgy food when the weather gets colder. Spicy soups, roasted root vegetables, strews. Less salads more strifries. That kind of thing.

I think I read somewhere you need to live a full year somewhere, through all the seasons, before you are fully rooted in your new environment. Not sure where I read it, but regardless, it has been my lived experience. Would you agree?

There are more seasonal recipe ideas to share, like an apple and blackberry crumble I have made on repeat lately, but have yet to photograph, a purple salad and maybe this year my own version of a mushroom soup, will make it here too.

Until then, I hope you will enjoy this pumpkin soup recipe!

apple-pumpkin soup


Apple & Pumpkin Soup

Serves 4

1 Hokkaido Pumpkin (Butternut Squash could work well too)

4 small or 2 big eating apples

1 yellow onion

2 cloves of garlic

1 tsp cumin, ground

½ tsp smoked paprika

½ tsp cinnamon

½ pinch of ground cloves

Approx. 1 litre stock

Sea salt & Black pepper to season

2 tbsp red wine vinegar


Heat oven to 200˚C. Make a few cuts in the whole pumpkin and then on a baking tray and roast for about 2h, until soft. Doing it this way, I’ve found make much less work than trying to wrestle with it in its uncooked state.

Once cooked and soft, set aside to cool. Once the pumpkin has cooled down, remove skin and seeds and roughly chop.

Chop onion, garlic and the apple into small pieces.

Heat a heavy based pan, add some olive oil. Then add garlic and onion and sauté until soft and translucent.

Add spices and fry off at a low heat for 1-2 min until fragrant. Add the apple pieces and the pumpkin pieces. Add the stock.

Bring to a lively simmer and cook for about 30min until the apple is soft.  Let the soup cool somewhat, add the red wine vinegar and then blend until smooth.

Season to taste. Add more liquid if you find the consistency too thick.

straightforward nutrition


Baked Apples with Spiced Nut butter & Dark chocolate

Baked Apples with Spiced Nut butter & Dark chocolate

Whilst I am chipping away at a non recipe blog post I thought I would share this seasonal favourite one of mine. It is funny because sometimes those types of posts almost writes themselves, and other times they require a bit more of an effort.

I picked up some really delicious Irish apples the other day when I was in Cork City. Ten apples for €2, so quiet a bargain. Which is so often the case when you buy locally grown or produced food that is in season.

To be honest, apples are not a fruit that I tend to include in my weekly shop on a regular basis. Bananas are my staple (not locally grown!), mostly because I love using them in smoothies. From there it can shift to whatever looks good and is reasonably priced.

Or if there’s something that looks interesting and that I haven’t tries before. Like green plums (seriously good), or kumquats, or just good old raspberries… You get the idea.

baked apple with spiced nut butter

Fresh slices of apple with some nut butter is a “classic” snack in nutrition circles. It’s easy, portable and give you that balanced combination of carbohydrates with fat and protein, that will prevent  your blood sugar from spiking too much.

But with the change of seasons, baking them whole in the oven is much more satisfying to me. And I suppose it I also means I am admitting that we have now left Summer behind, to get ready for wet and windy days, woolly jumpers, cozy hats, warm fires, darker evenings as well as beautiful clear skies with all the colourful glory that the autumn leaves brings.


Do I feel ready for this kind of transition? I don’t know… Are we every truly ready for any change in our lives, consciously chosen or not?

Yet it is the one certainty that we have.

And need to learn to live with.

The constant of change.


I began making baked apples like this about two years ago and since then this recipe have become an autumnal ritual of sorts. It is a lot less effort than you may think and only requires a few basic ingredients.

I tend to use eating apples rather than cooking apples for this.


Baked Apple with Spiced Nutbutter & Dark Chocolate

Recipe is based on one apple per person so double ingredients per amount of apples required.


1 crispy type of apple

20g good quality dark chocolate, roughly chopped

1 tbsp nut butter, (hazelnut would be me personal preference)

½ tsp mixed spice or pumpkin spice

Good quality ice cream, dairy free alternative or crème fraiché, to serve


Heat your oven to 180˚C. Cut the top off and then core the apple. If you have one of those tools to core an apple, lucky you! It will make it much easier.  If you don’t use a small knife to cut around the core and then remove it.

Place your apple(s) on a lined baking tray. In a small bowl mix nut butter and spices together until you have an evenly paste.

Stuff the core of the apple(s) with alternate teaspoons of nut butter and chocolate until it’s full. Place the top back on.

Bake the apple(s)  for about 30 min until the skin is soft and cracks and the flesh is fairly soft.

Serve warm with your choice of ice cream / cream / dairy free alternative.

baked apple with spiced nut butter

** Some interesting alternatives for stuffing would be to use some butter instead of the nut butter (if you can tolerate dairy). Or some almond paste.  You could make your own by blending ground almond with some maple syrup.

If you don’t have mixed spice, using ground cinnamon and / or cardamom would be delicious too!

Oh and I recently spotted this baked apple recipe over on Green Kitchen Stories. That looks pretty rad too.

And if you want to make your own nut butter go here.

Coconut Panacotta with Raw Raspberry Chia Jam

Coconut Panacotta with Raw Raspberry Chia Jam


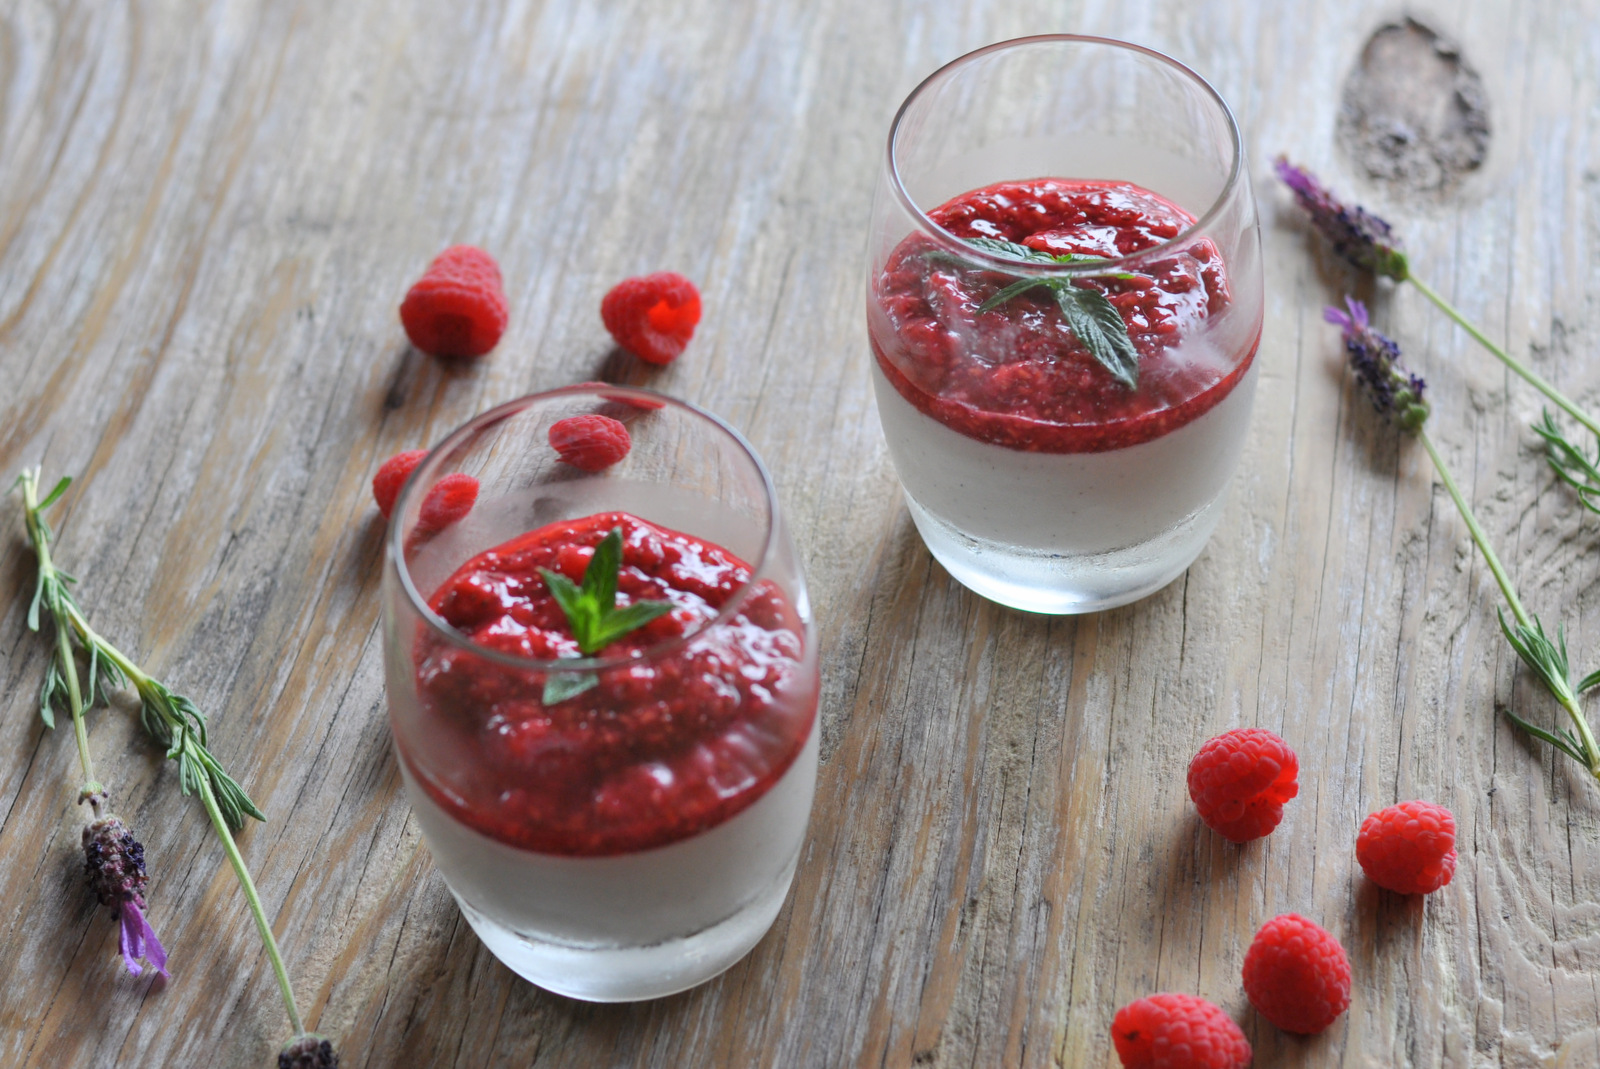
Let’s continue with the theme of sweetness. And summer.

After about 10 days spent with my family in Sweden, where it wasn’t up the usual July temperatures, I subsequently returned to an Ireland which kind of is.

So that inspired me to share this recipe I created a few years ago for a guest posting on someone else’s site, and since I’ve been a little short on time, plus the fact that there are some internal work currently being done to the house I live in (think dust, shambles and loud drilling noises) then coming up with something totally fresh and new felt too challenging.

Here we are with an oldie, but a goodie.  Perfect for summer.


In these days of everyone going gluten free, dairy free, sugar free, vegan or paleo it can become a minefield to find something to eat, or serve, which is still tasty, nourishing and made from simple wholefood ingredients.

Personally I don’t believe that adhering to any of the dietary requirements above should mean restrictive and boring. (Nor does it mean that we should attach any other emotional connotations to it either, but that’s a different conversation.)

Rather the opposite in fact. If you have to adhere to any food restrictions for health reasons they can in fact serve as a gateway into a more simplistic, holistic and diverse way of eating.


The question I constantly ask myself  is “When did it become so complicated to choose what to eat?”

In the end of the day no matter what latest nutritional trend you follow, doesn’t it just come down to the quality of the food in the end? How it has been grown and produced – with care. How it’s been prepared – with love. And how it’s being served and eaten- with joy!

I don’t follow any particular dietary trend and eat most things which will make me feel good and do something good for my health. And if you’re going to cut something out of your diet for good, cut out the guilt.


Michael Pollan, author of several books on food and the history of cooking, eating, agriculture etc. have the best advice I know, which is really straightforward.


Eat (REAL) food. Not too much. Mostly Plants.

You simply can’t go wrong with that…


Now let’s move on to the recipe.

This is a simple, yet decadent summer dessert which should please the majority of your guests regardless of what they call themselves. what they can or cannot eat.

coconut panacotta

Coconut Panacotta with Raw Raspberry Chia Jam

Serves 2-4 depending on the sizes of the serving glasses you use


Panacotta:

1 can of coconut milk – Preferably organic and additive free

1 ½ tbsp. raw honey – use maple syrup if vegan

1 tsp vanilla bean paste, or vanilla powder

Zest of one organic lemon

2g agar-agar powder –  available in healthfood shops


Raspberry Chia Jam:

125 g fresh raspberries, washed & drained

Juice of ½ lemon – optional. Lime would be lovely too

1 tbsp of chia seeds


Place coconut milk, vanilla bean paste, honey, lemon zest and agar-agar powder in a small sauce pan. Bring it to a boil while constantly stirring to make sure the honey dissolves and prevent the agar-agar flakes from sticking to the bottom. Once the coconut milk mix reaches boiling point boil for one min, then remove from to heat and allow to cool. Once the coconut milk has cooled to finger temperature pour it into small serving glasses and allow to set in the fridge.

To make the chia jam; place your berries in a food processor / blender. Squeeze the lemon juice straight into the bowl of your food processor / blender. Blend until smooth. Transfer the blended berries to a container. Add in the chia seeds and stir until well combined. Let the chia jam sit for an hour or two to allow the seeds to gel. Stir a few times.

Add the jam on top of your set coconut panacotta to be served straight out of the glasses it’s set in. Garnish with a sprig of mint or some shaved dark chocolate.

Note* I did not add any sweetener to the chia jam. You can of course do so if you want it less tart.

Raw Chocolate with Tahini

Raw Chocolate with Tahini


I have this things for grocery shopping… And trying out new foods… And sometimes this “thing” turns out to be a rather indulgent AND expensive hobby.

I’m still not sure where this love of exploration comes from, though I keep blaming the year I spent living in the Australian bush, where much, the only escape route off the farm was the weekly trip to the supermarket. But that’s now over a decade I go, so it may not really cut it as a valid excuse anymore.

This is definitely where the love affair really took hold though and I’ve carried on with it ever since.

Maybe it is part of a food scarcity things, from that time too? Though at that time I wasn’t restricting what I was buying as I had very few other expenses than buying foods. My accommodation was included in my weekly pay and I didn’t own a car either (and boy does that save you money!). But the downside of not having a car was that I was always depending on others to take me to the shop, which was a good 45 min drive away.

These days things are a little different and, though I live in a rural part of the country I have a car, I am 10 min drive from a town with some very decent food shops, and I am about 30 min from the second largest city in Ireland. No risk of starving or going without. Yet I still get excited about grocery shopping!


The recipe I am sharing here is an inspiration from one of those explorative grocery shopping trips I did last year when I was over in Stockholm, visiting my friend Louise and going to a few different nutrition / foodie events.

When I was in this small delicatessen I saw this beautifully wrapped chocolate that also contained tahini. Got totally sucked in and just had to buy it! Truth be told, it was worth it for the beautiful packaging alone. Clever marketing there, that’s for sure.

Ever since then I have been thinking of trying to re-create something similar at home.

This is it!

I used this recipe as a base, and more or less swapped the peanut butter for tahini instead. If you are not a tahini fan like me, I think using hazelnut butter would make an amazing chocolate. It’s not one I have tried yet myself, but my imagination have no problem conjuring up what that kind of taste explosion that combination will provide. I mean who doesn’t like chocolate with hazelnuts???

Homemade chocolate is surprisingly easy to make, once you’ve invested in the ingredients. And since this type of eating have become a lot more common in the past few years, finding raw cacao and raw cacao butter isn’t impossible.

No, they are not the cheapest ingredients, but you will get a lot more cacao for your bucks than the typical “chocolate” you find sold everywhere.


In writing this post I am also realising that it is a privilege to be able to both have time, money and the opportunity to find these ingredients easy enough. And for that I am grateful.


raw chocolate with tahini


Raw Chocolate with Tahini

Makes 12 large hearts

50g cacao butter

1 heaped tbsp tahini

2 heaped tbsp raw cacao powder

2-3 tbsp maple syrup – depending on desired sweetness (less works well in for this recipe)

½ tsp ground cinnamon – optional but delicious


Melt the cacao butter in a bowl over a pan of hot water. Once the cacao butter is fully melted add the tahini and stir well. Then add in the maple syrup, the raw cacao powder and the cinnamon, if using.

Stir for a minute or two until you have a really smooth cacao mix. Taste and add a little more maple syrup if you still think it is too bitter.

 Remove the bowl from the stove and pour it into a silicon ice-cube tray. Transferring it to the fridge to set. After a few hours your chocolate will have set and you can pop it out of the ice-cube tray.

** If you don’t have an ice cube tray / chocolate moulds, you can pour it on to a small lined tray instead. **

Store in an airtight container in the fridge. Your raw chocolate will keep for a few days in the fridge. Probably longer in the freezer.


raw chocolat with tahini

If you do make these please let me know what you think, and if you’ve ended up making new creations and taste combinations from this basic recipe!

Swedish Chocolate Balls – well almost

Swedish Chocolate Balls – well almost


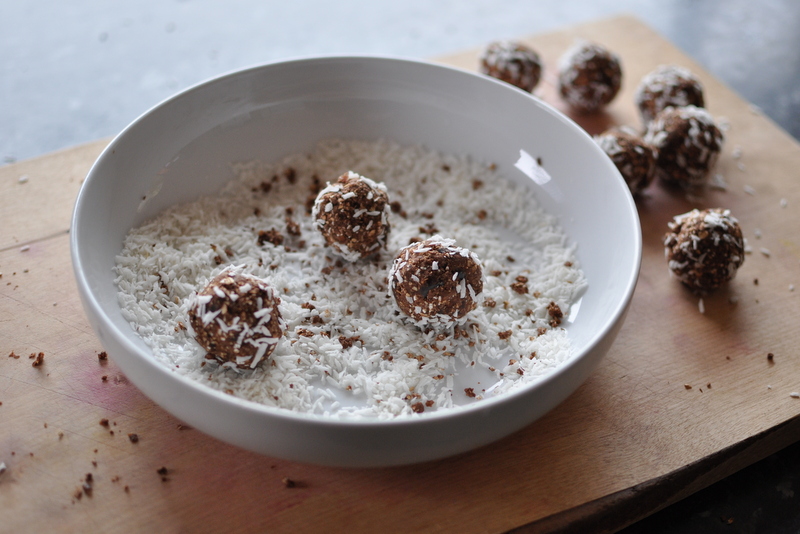
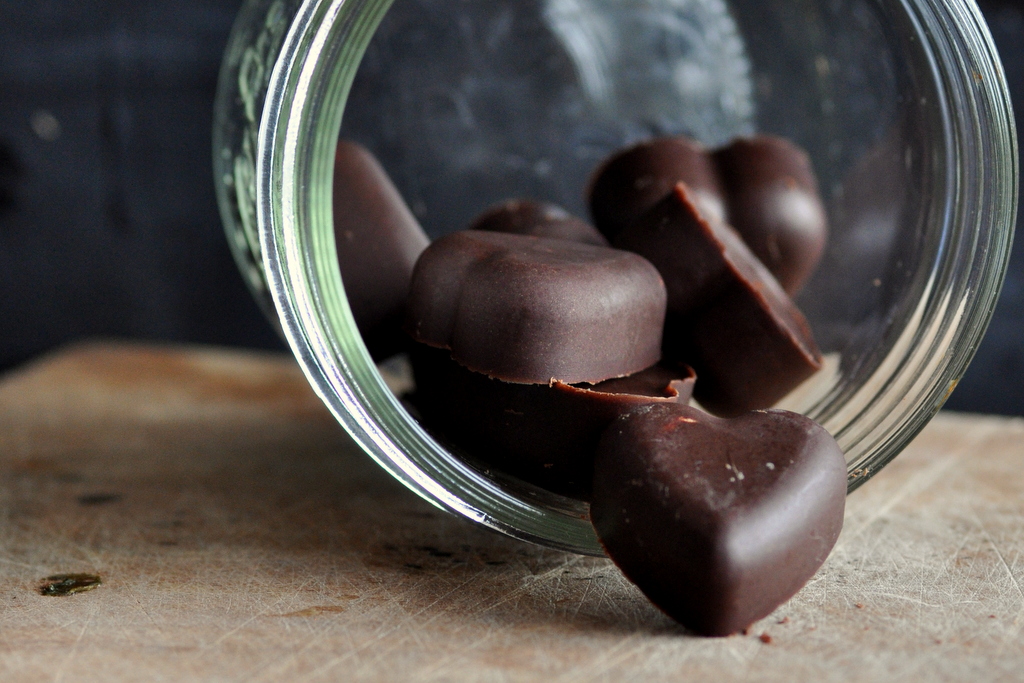
I think it was about time I shared another sweet recipe here on the blog again. And if you read my last post, about my own personal history with food (sugar in particular) and how I made eventually made peace with it all, then you will know that I love the taste of sweet.

Dates are such a versatile food. They are sweet and sticky and actually good for you with a high amount of fibre, but also the vitamin and mineral content like zinc (for immune system) magnesium (for energy production), iron (for red blood cells) and potassium (for nervous system).

Because of their “stickability” they work really well in all types of raw desserts as they so seamlessly hold everything together. I also love that when we are using dates as sweeteners we tend to use the whole fruit, just like nature intended.

This recipe is based on a typical traditional Swedish recipe and one we made time and time again as kids – Choklad Bollar.

The original recipe calls for butter, sugar, oats and cacao powder. And perhaps a little coffee too.

Here I have replaced the butter and sugar with the dates and added some melted cacao butter as fat. You can use coconut oil too.

Traditionally “Choklad Bollar are rolled in desiccated coconut, which I personally like though I made another version of these for a recent talk I did locally and rolled them in some melted dark chocolate and some roughly chopped toasted hazelnuts. Much like a giant Ferro Roche… Yeah, just imagine! Totally worth the extra effort.

Straightforward Nutrition

straightforward nutrition


Chocolate Oat & Date Balls

Makes about 10 medium sized balls

½ cup rolled (porridge) oats

20 small pitted dates  – or use about 10 soft Medjool dates

2 tbsp raw cacao powder

6 tbsp strong coffee – or use same amount of water

2 tbsp melted cacao butter – or coconut oil

Shredded coconut to coat the balls in


First blend the oats in your food processor until you have a rough ground texture. Soak the dates in some hot water for about 1 min, then drain. Just to soften them a little. If you are using Medjool dates you can skip this step as they tend to be much softer. However don’t forget to remove the pits!

Add the rest of the ingredients to your food processor and blend until it all comes together like a sof dough.

Roll the dough into small balls with your hands and roll them in some shredded coconut.

Store in an airtight container in the fridge. They will keep for a few days.

(I’m always musing to myself about the difference between the words “keep” and “last”. To be honest, I am actually just guessing how long they will “keep” for, since I’ve never had any “last” long enough to see when they would be gone off…)